Friday, January 29, 2016

The Little Yellow Skirt: Introducing Britnee

The Little Yellow Skirt
Introducing Britnee

Although I still have a few days left of Ellee's outfits, I decided to take a break and introduce you to another daughter of mine...Britnee.  She's my sweet 17 year old that graduates this year.  She recently got a "big girl job" and was needing some decent dress outfits that were appropriate to wear to work.  She's a rather petite girl and perhaps a bit picky about what she likes;), but we were able to find this cute dress.  The only problem was the top was not sufficient to wear to work, so it was time to do a refashion.


The dress that we started with

sewing the ends together with a zig zag stitch
First I cut the top off of the skirt right at the seam line.  I left in the elastic waist, at least to start with.


Next, I cut a 3 inch black elastic band the length of Britnee's waist.  Then I zig zagged the ends together, making a circle.

What it looked like with the ends sewed


After making a circle, I flipped the skirt inside out and pinned the top to the belt, the right side was flat against the back of the belt.
I sewed double stitches (using a very wide stitch) making sure to sew as close to the edge as possible.  The second stitch was put on there to hold the fabric flat against the belt.


After everything was sewn together, I took out the elastic that was already sewed in the skirt.  This took FOREVER and it was a pain in the butt, but it had to be done.

All stitches out and ready to wear.


Pretty Girl


Friday, January 8, 2016

Refashion Friday #2: Heirloom Sleeping Sack

Refashion Friday #2:  Heirloom Sleeping Sack


I can not believe that so many weeks have already gone by since my last Refashion Friday.  I guess I went MIA while I delved into the world of Ellee Days.  I do still have 2 left to complete on that project, but what you don't know is I do about 5 other projects in between each of Ellee days and I've been dying to share this one with the world since I got the privilege to take pictures of this beautiful baby a week back.  So, in order to get back on track with Refashion Fridays, let me introduce to you Ava Grace Marie...

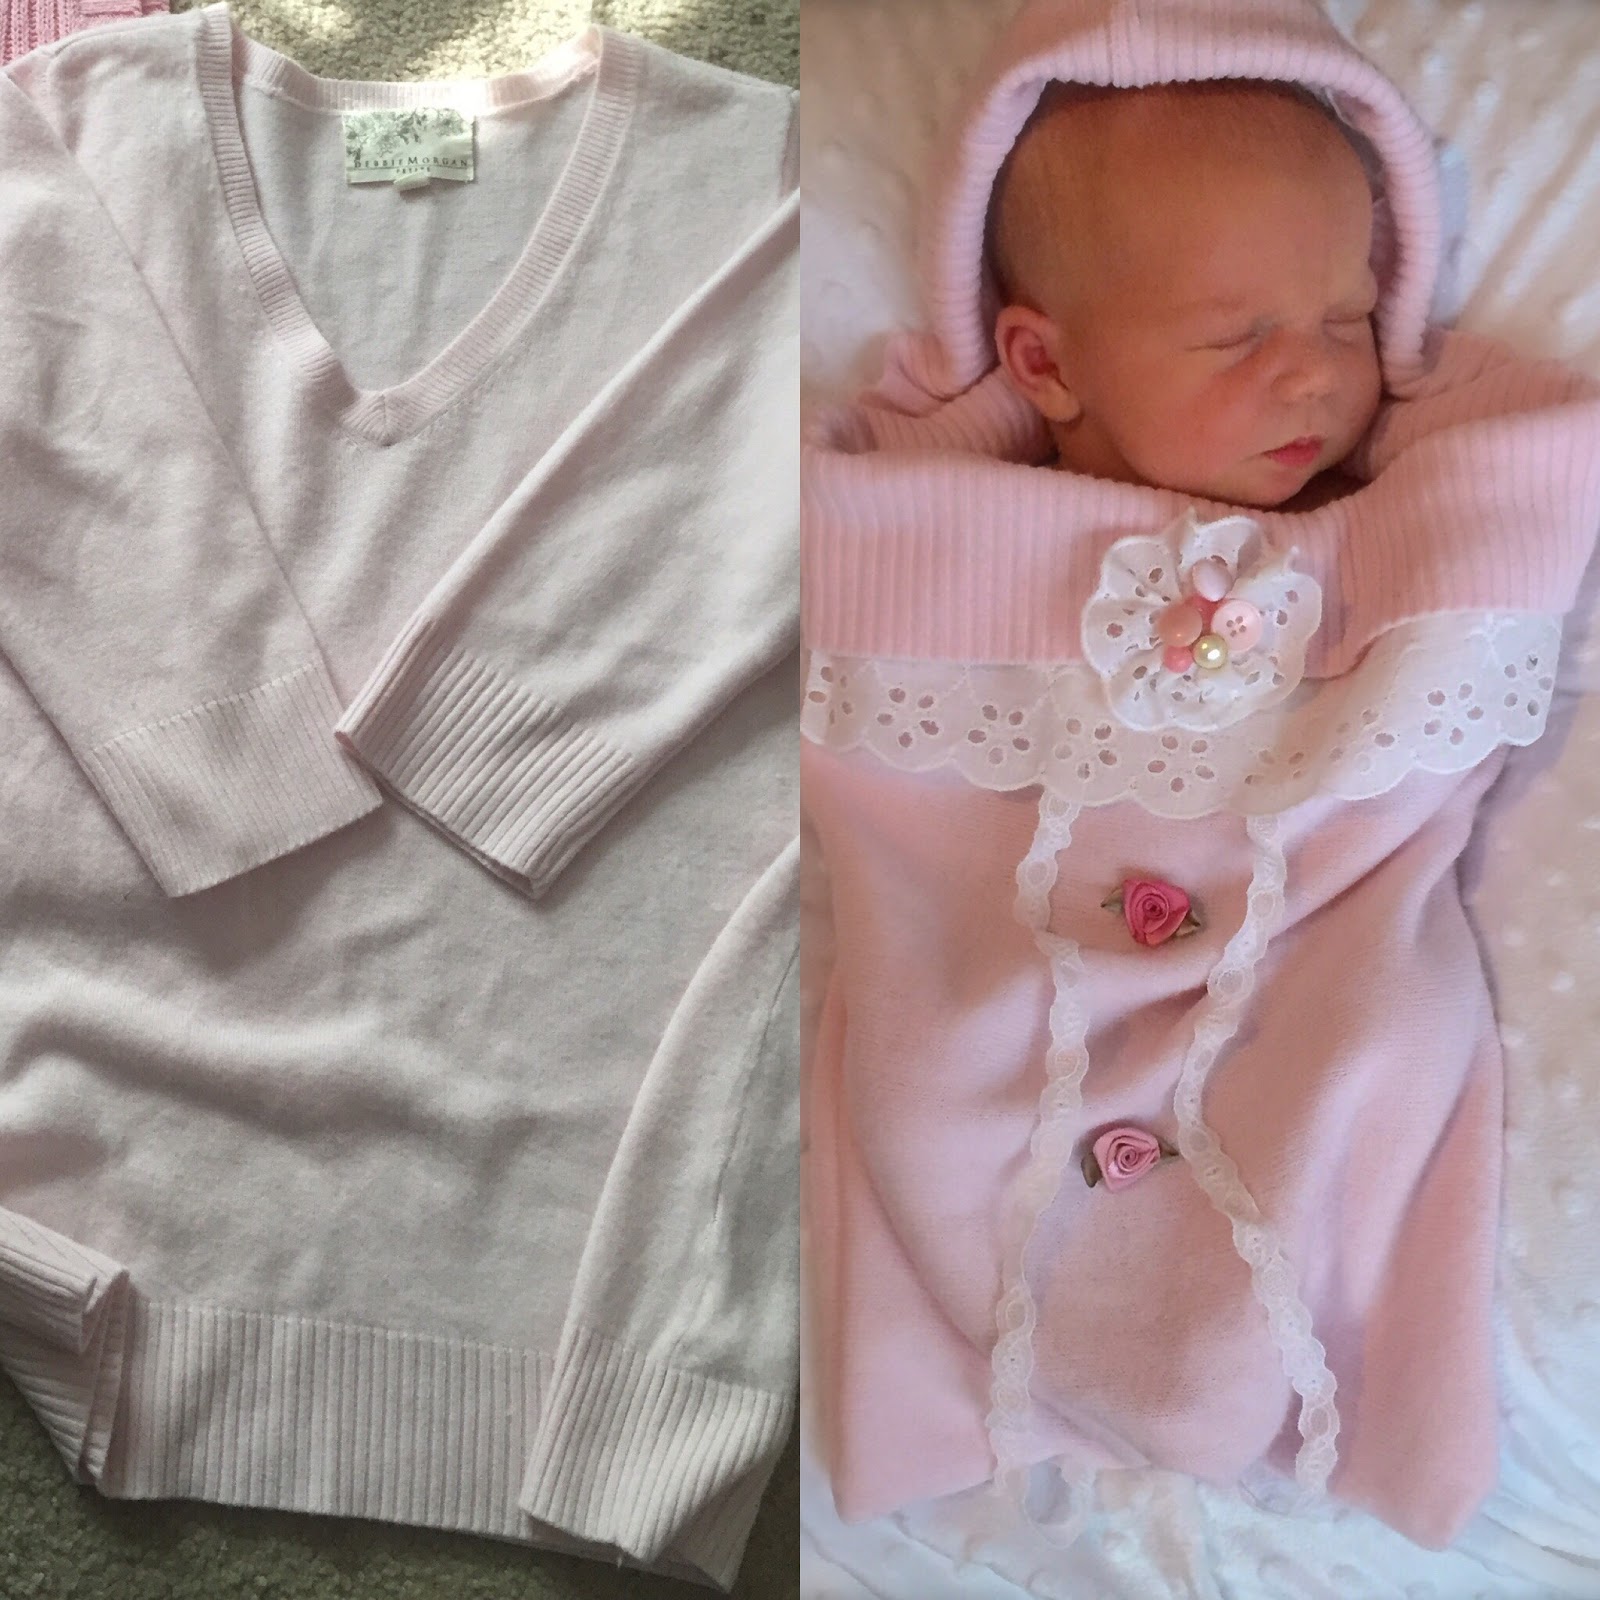
This month I wanted to take pieces of clothing that have special meaning and remake them into something that can be a ready remembrance of the people we love.  This sweet little sleep sack for a baby was just the thing I needed to include a loved one into a special memory of the intwining of the past and the future.  For a grandma that couldn't be there on this special occasion, her love embraces her grandchild, warming her with her continuing love.  This special sleep sack is made from a sweater and adorned with special pieces of something borrowed.


It started with a precious grandmother's sweater.  The hardest thing was cutting into that fabric.  But there is something healing about making that first cut.  Something about knowing that something that was no longer used was going to be used again pushed me forward.  The memories were not being forgotten, they were being rewritten for the legacy of a great woman to go forward and bless a new generation with her love.


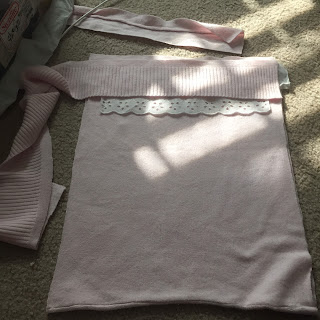
I cut one side of the leftover bodice and this became my main piece of the sleep sack.
 I found some garnishment pieces that created a feeling of nostalgia.  The lace piece wasn't quite wide enough to be seen when the sweater band was attached, so I found a small scrap piece of fabric that I cut the same length and sewed on to the lace piece, making it wide enough to be seen.  I attached it to one side of the right side of fabric (of the bodice piece).  I pinned this down in place.

lace with extra fabric to make it wider
attaching lace to one edge of sleep sack
placing it face up on the right side.


Next, I cut the waist band to fit the top of the sleep sack, across the lace piece.  I flipped the fabric bodice over and pinned the RIGHT SIDE of the waist band to the BACK SIDE OF THE BODICE.  Sew across the width of waist band, sleep sack, and lace piece.

cut to be same width as sleep sack

RIGHT SIDE of waist band matched with WRONG SIDE
of sleep sack.

sew a stitch across the width of sleep sack

when waist band is flipped over, it should look like this,
with lace edge protruding beyond edge of waist band.

Next, I needed to create the cap.  I used the sleeves for this part.  Once they were opened up, the finished edge was perfect for the edge of the cap.  I put the two sleeves right sides together and sewed in the shape of a baby's head.  I had to play with it a bit, but came up with a shape that worked.  I then took some scrap fabric and made the same size and sewed it the same way.  I then placed this inside the cap and fitted it to cover the inside of the cap, covering the seam on the cap.
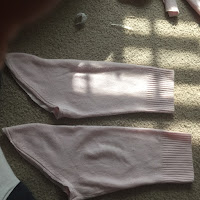
leftover sleeves
sleeves cut open and put on top of each other


Use the bottom half of the sleeve
as the front of cap, cut to fit around
baby's head
cut out a lining the same shape as cap


cap sewn together
                                                 
                                                          inside of cap lining
Sewing the lining into the cap being careful to sew only to the
edge of the band. 
Ready to sew cap to body of sleep bag.


Next, I pinned OUTSIDE OF the cap to the RIGHT SIDE of the other end of the sleep sack.  Then I cut another length of waist band to cover the other end of the sleep sack.  I pinned this waist band RIGHT SIDE to the INSIDE OF THE CAP.  I sewed the whole width of the top of the sleep sack.  When waist band is folded down, it will show a finished seam.


With waist bands folded down in place, match the sides of the sleep sack.  Sew a straight seam on both sides with the bands folded down in place.  Put on garnishments to the front in any way you'd like.


Monday, January 4, 2016

The 12 Days of Ellee The Tenth Day A Lacy Ruffled Sleeved Dress

The 12 Days of Ellee


On the Tenth Day of Ellee 
My mother made for me
A Lacy Ruffled Sleeved Dress,

I believe this dress might have been my most challenging yet!  It's all because of the lining that was underneath this cute little sundress, separated from top lining and bottom lining.  I ran into a problem because I didn't feel I could just sew over the top of the lining along with the fabric.  It just wouldn't give the clean finished effect that I get when I sew the lining separately.  Well, I shouldn't have listened to myself, because it ended up looking messy on the underneath and guess what?  Ellee doesn't even care anyway!  So, I digress....
pinning to Ellee's body
Pinning to Ellee's body

The challenge was to make this size large, lined dress to fit little framed Ellee.  Not only that, but it was strapless, so you knew I would need to figure out some sort of sleeve.  Now, this particular outfit was not going to lend the flexibility of extra fabric quite like the Chevron dress had that we sewed earlier in the series.  


Sewing off the pockets on the bottom half.
The pockets cut off.  Now to mess with lining.


So, while I sewed the sides in on this dress, after fitting them to Ellee's body, I took inventory of my supplies and decided upon some lace that has been sitting in my stockpile for years.  Although it was a little much for my tastes, Ellee loved it because it was ruffly and lacy, the things she loves most!  So, I went with it.  


piece of lace I found in my stash

sewing on the seam tape by folding it in half.

The finished ruffle

This particular lace already had a gathering stitch in it, so I pulled that to the tightness that I wanted the sleeves to be and I sewed a straight stitch over some seam tape (that I also already had), folding the seam tape in half with the gathered stitch in between.  It worked perfect to create the ruffle with not adding too much of a strap that everyone could see.  

Ironically, fitting the sleeves so you can't
see her bra.

Ironically, fitting the sleeves to the front of dress
so you can't see her bra.

Next, I fitted the gathered lace into the right place on the tops of the dress, then sewed the lace edges in place.  She loved the sleeves and I loved that I couldn't see her bra straps:)


It's only taken me four days, but I wanted to say Happy New Year to all my current readers.  I have found my nitch in something I enjoy and I have so much fun sharing my "artwork" with you!  If you think about it, leave me a comment here and there and maybe a like and follow on Facebook (posted under Just Five More Minutes of Grace, my other blog page) and make my day!  God bless! Angie


Sunday, January 3, 2016

The 12 Days of Ellee The Ninth Day Infinity Scarf with Butterflies

The 12 Days of Ellee

On the Ninth Day of Ellee 
My mother made for me
Infinity Scarf with Butterflies,


Magic, I know, right?  I do have to say, this may have been one of the more trickier projects, but still possible when you put your mind to it.  So, let's begin...

This was the beginning shirt.  Ellee really liked it because of the ruffles everywhere:)  Sadly, I wasn't able to rescue the ruffles, at least not for this project.  When I cut, I carefully put the ruffles away for another day, along with the sleeve cuffs and bottom elastic piece.  I'll figure something out to use those for.  Maybe a headband?  hmmm, maybe....

I began by cutting off those precious arm cuffs and bottom cuff.  I cut off the sleeves from the bodice, then cut the sleeves open and laid them flat.  I cut the ruffled front piece off as close as I could to the seams.  I set all these pieces aside and laid all of the flat pieces out.  I was lining them up to see how I could cut the widest section out of each piece.  When I figured out the smallest width I could get, I cut all of my pieces the same width, even though they were all different lengths.  My end goal was going to be to sew them end to end to make the infinity scarf as long as I could.
Cutting off the arm cuffs
Lining up the pieces to cut them evenly

After I cut all pieces the same width, I laid them right sides facing me.  I overlapped about 1/2 inch of the same side and sewed a very little zig sag stitch across the width of the fabric.  Once done, I trimmed both sides right up to the zig zag stitch.  Then I "rolled" the zig zag stitch so that there would not be an open seam on either side of the fabric.  I sewed right over the top of the zig zag with a straight stitch, leaving no open seams or edge on the seam.  I did this the same on all my pieces, matching end to end on the first and last piece, forming a circle.  Once the circle was complete, I trimmed up the edges, then sewed up a rolled hem seam on the inside and outside length of the scarf.

sewing the two pieces of fabric with a zig zag stitch
And, that's it!  The scarf turned out to be just the right length for Ellee to wrap around her neck twice.